SmartSTREAM Startup Guide
Return to the User Support Site TopHow to Use the Rental Live Encoder
This section provides excerpts and supplementary explanations on how to use the optional rental encoder device “LiveShell X”.
For details, please refer to the “LiveShell X Online Manual”.
Creating a Dashboard Account and Registering LiveShell
Creating a Dashboard Account
-
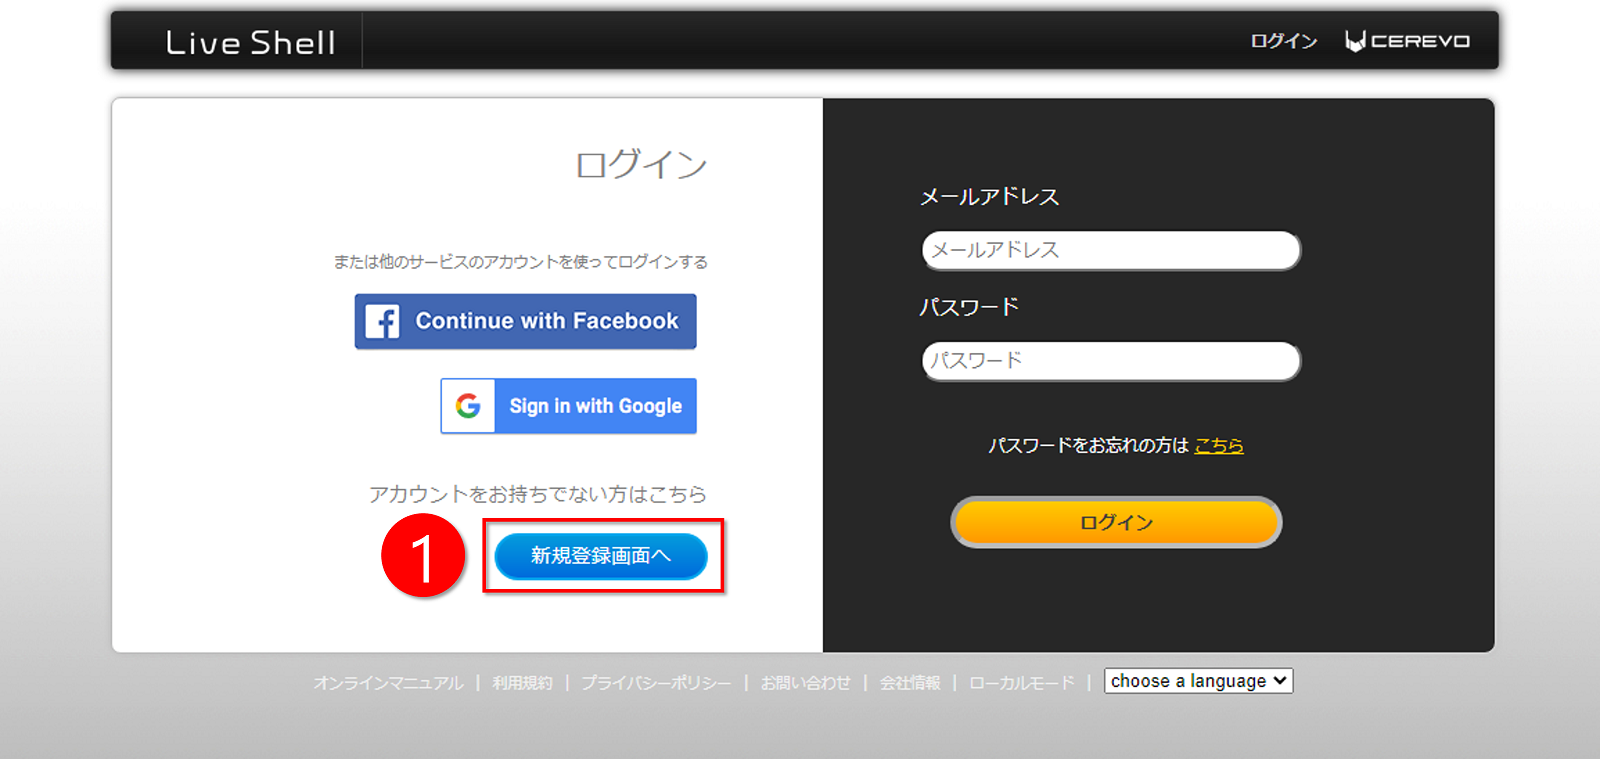
Access the LiveShell login screen and click Go to new registration screen.
-
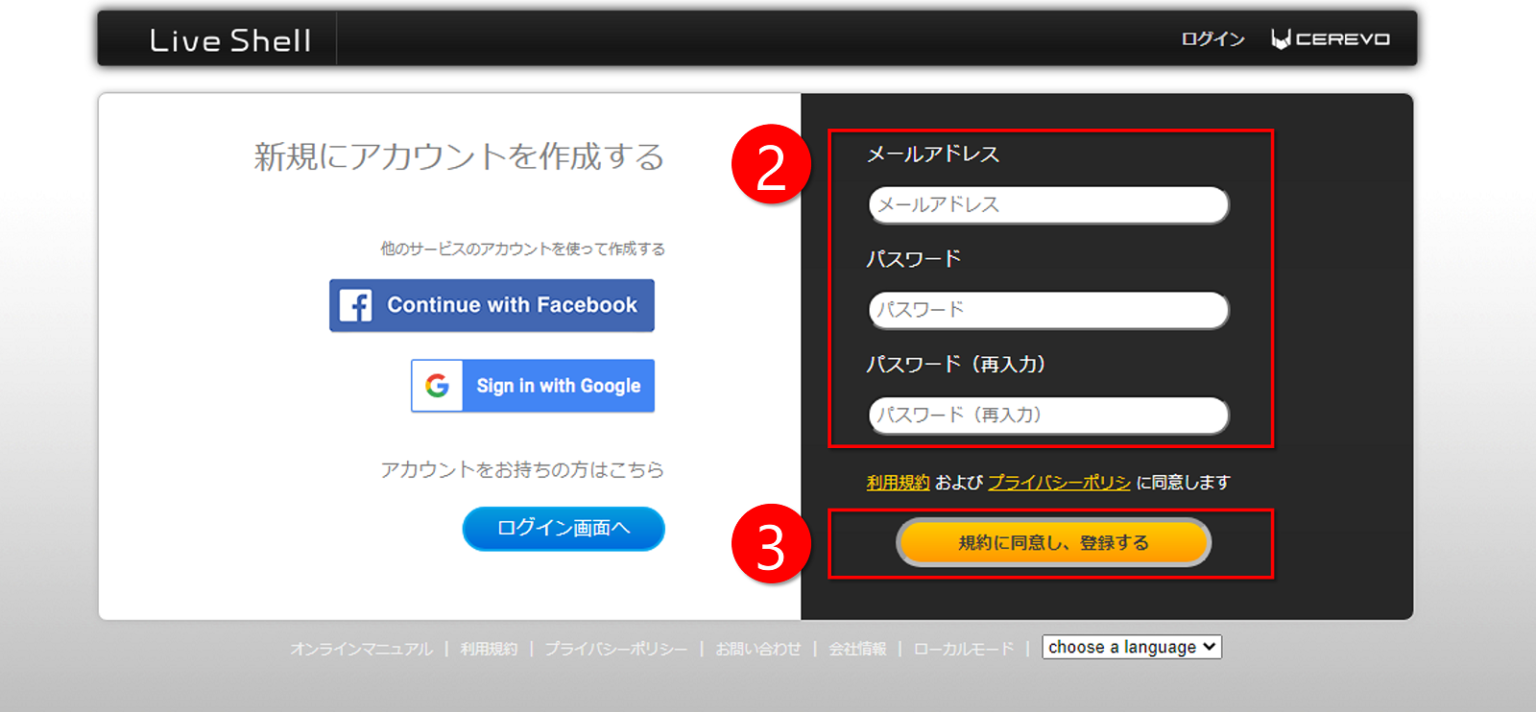
Enter your email address, password, and password (re-enter).
-
After reading the Terms of Use and Privacy Policy, agree to the terms and click Register.
-
An email will be sent from Cerevo to the email address entered in step 3. Click the URL provided in the email.
Selecting the LiveShell to Use
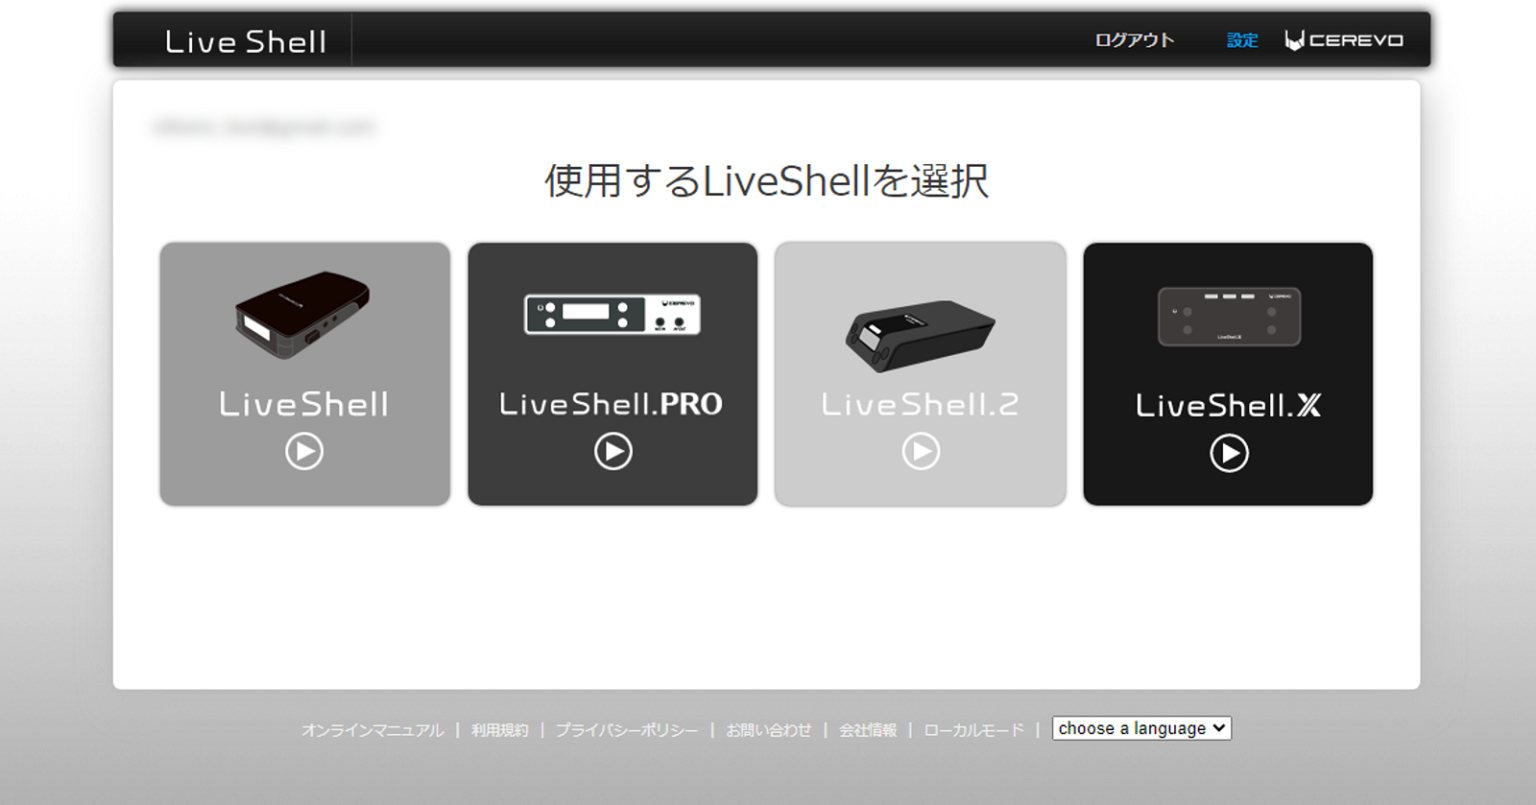
Available LiveShell series devices will be displayed on the web page. Click LiveShell X.
Selecting the Service to Stream
-
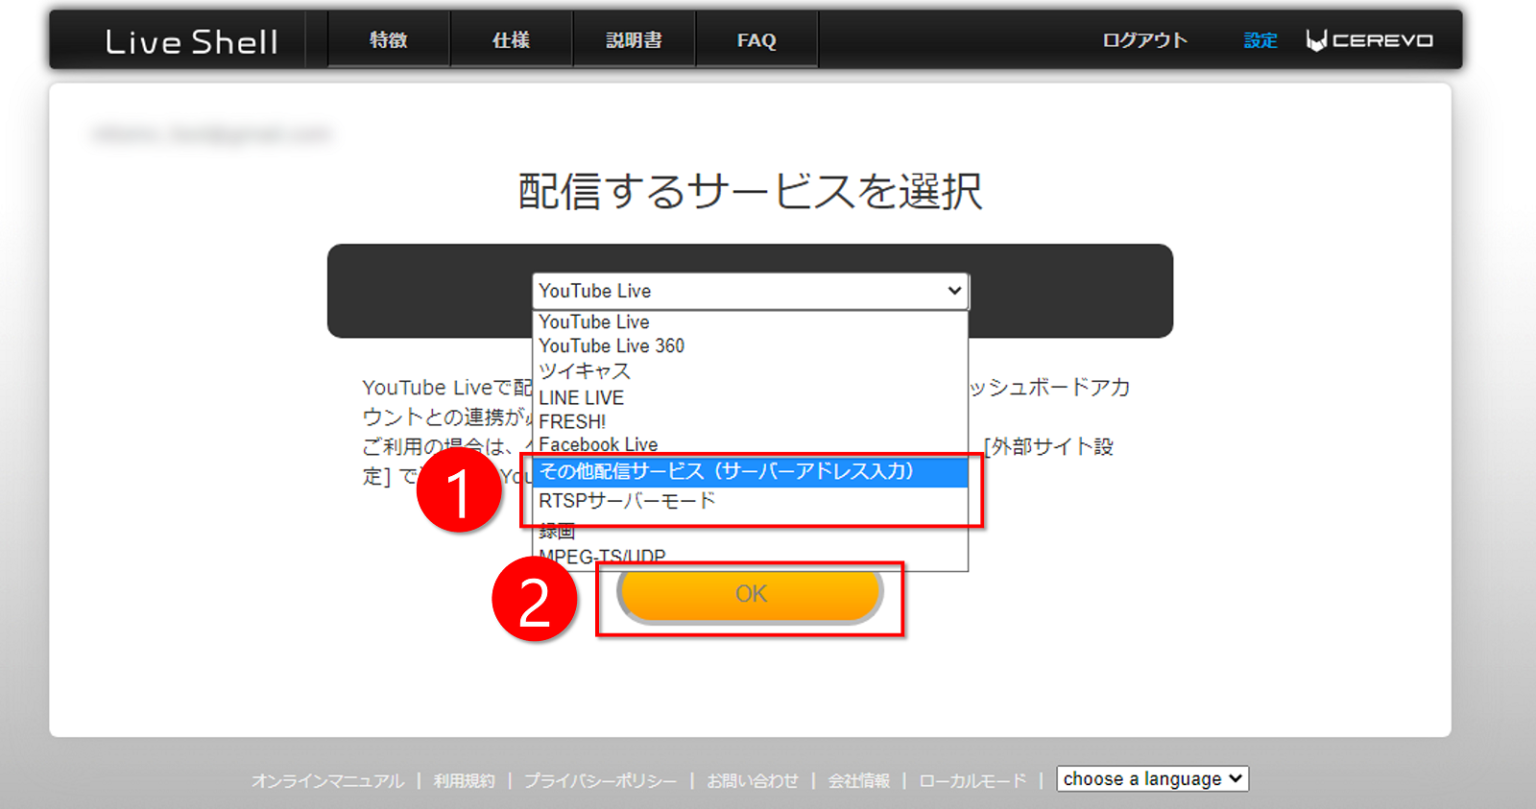
Select Other streaming service (enter server address).
-
Click OK.
-
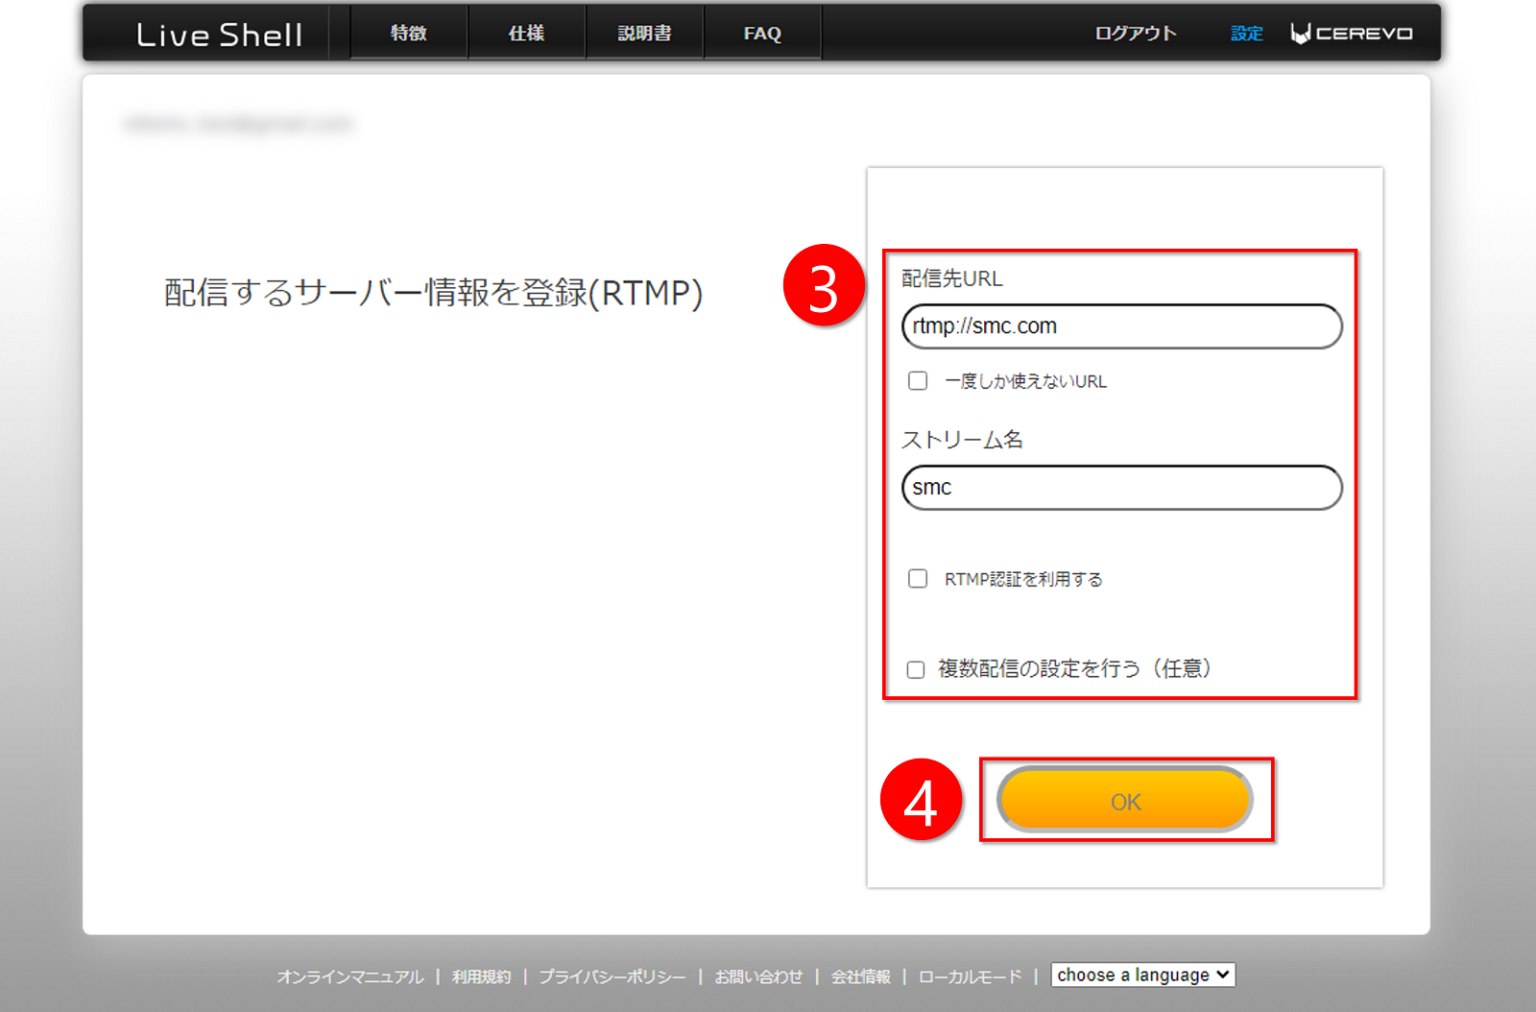
When performing a live stream, a destination URL and stream name (stream ID) are required, but here we will skip this and proceed.
When performing a live stream, a destination URL and stream name (stream ID) are required, but here we will skip this and proceed.
(Leave “Use RTMP authentication” and “Set up multiple streams (optional)” blank.) -
Click OK.
Selecting the Internet Connection Method
Select how LiveShell X will connect to the internet.
Prepare a wired LAN connection, select Wired LAN, and click OK.
-
Insert a LAN cable into the LAN port on the LiveShell X unit.
-
Press and hold the power button on the upper left of the front of the LiveShell X unit for 5 seconds to turn the power on.
-
Confirm that a 4-digit number is displayed on the unit’s LCD screen and enter that number into the Dashboard.
-
Click OK.
When the screen automatically transitions and the Dashboard top page is displayed, the initial setup (account creation) is complete.
Streaming Method
Starting the Stream
As advance preparation, connect the LiveShell X unit to the camera and other devices using the appropriate cables according to your intended use.
Click the tab of the channel you want to start streaming.
For details on channels, please refer to Using the LiveShell series.
-
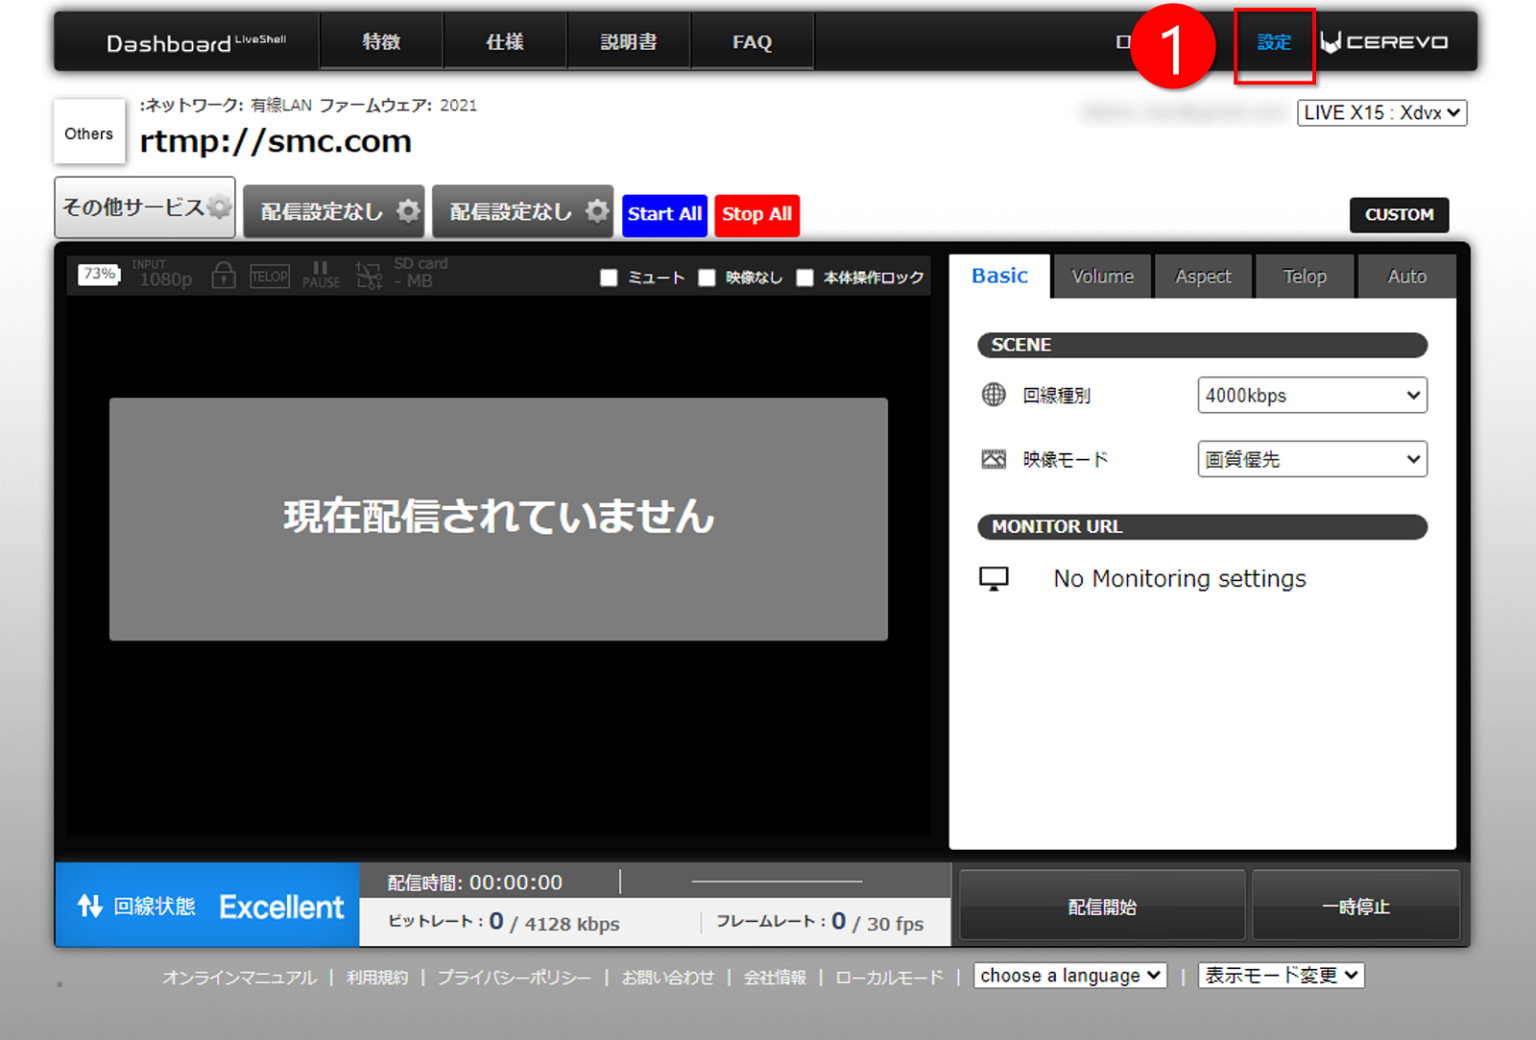
Click Settings at the top right of the Dashboard.
-

Confirm that the Streaming Settings tab is selected.
If Streaming Settings is not selected, click the Streaming Settings tab to select it. -
Confirm that the streaming destination service is set to Other streaming service (direct server address input). If not, select Other streaming service (direct server address input).
-
Click Set as streaming destination.
-
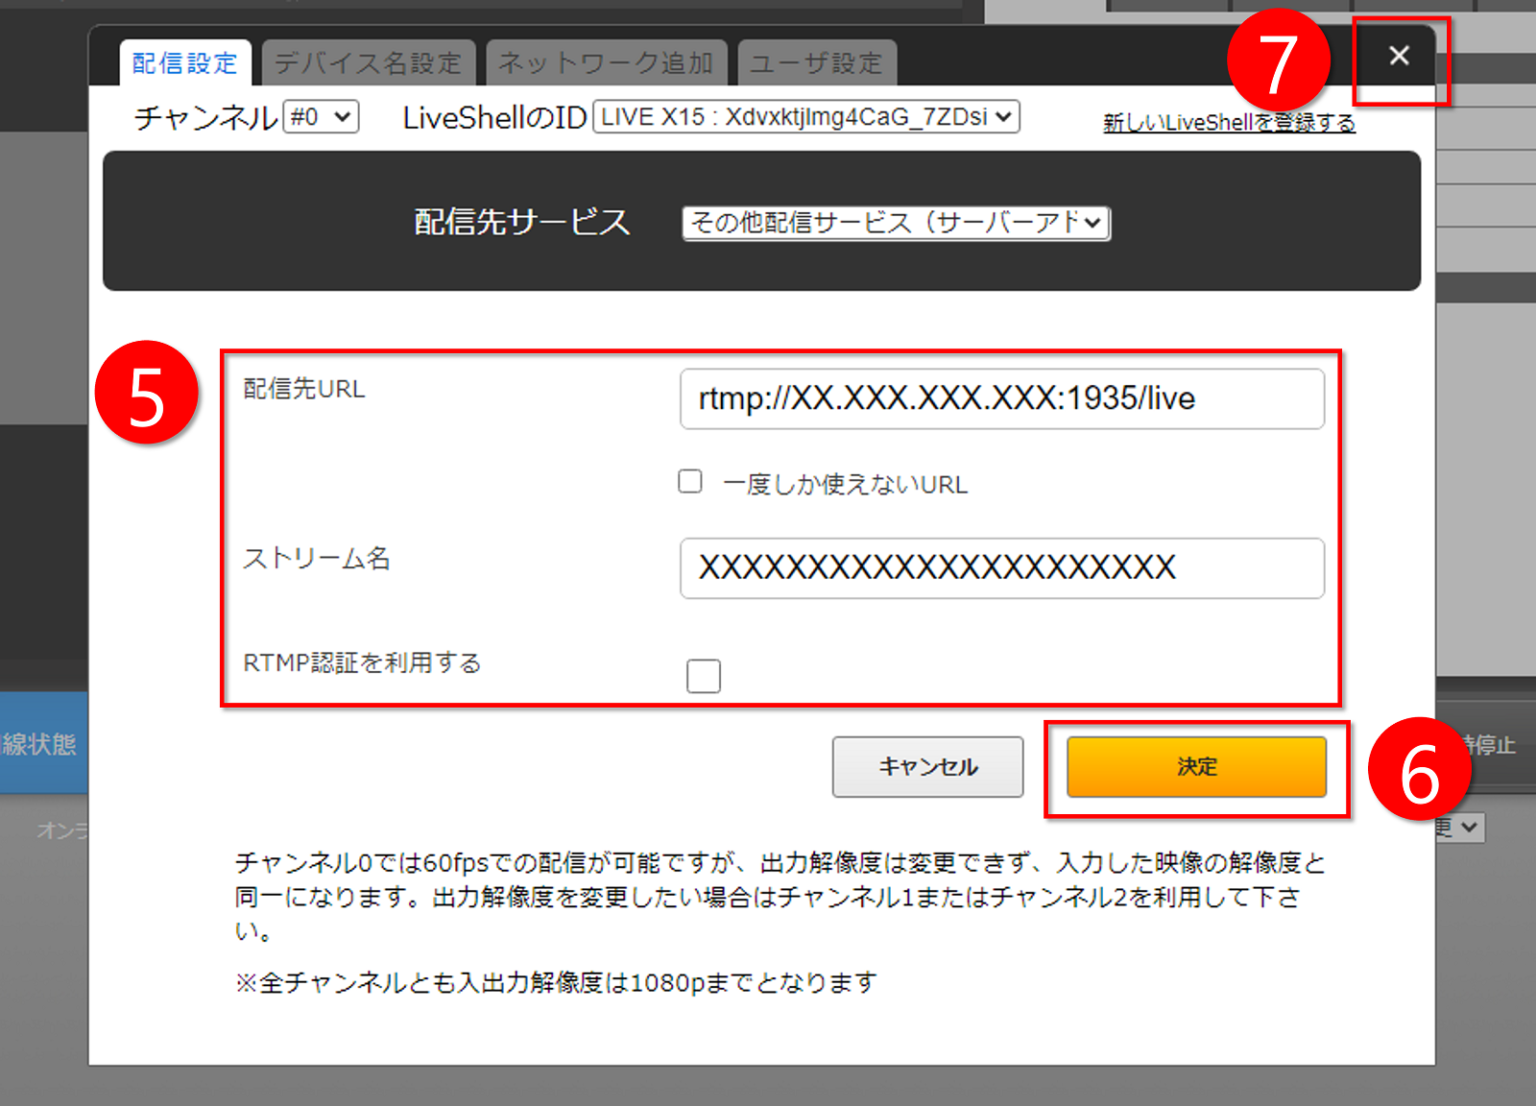
Enter the URL issued by SmartSTREAM into the Destination URL and Stream Name fields.
You may leave “Use RTMP authentication” blank. -
Click Confirm.
A message saying “Saved. From next time, streaming will be sent to this service.” will be displayed, and the change of streaming destination will be completed. -
Click the × at the top right of the window to close the window.

When you create a live event on the SmartSTREAM side, a URL like the one below will be issued.
(Refer to “Live stream a video” > “Upload and encode a video”.)For example, in the case of the following URL, rtmp://54.249.XXX.XXX:1935/live/XXXXXXXXXXXXXXXXXXXXXX)
・Set “rtmp://54.249.XXX.XXX:1935/live” as the Destination URL
・Set “XXXXXXXXXXXXXXXXXXXXXX” as the Stream Key
-

Click Start Streaming on the Dashboard to begin the live stream.