SmartSTREAM Startup Guide
Return to the User Support Site TopCustomize the Player
In this section, you can create a player called a “Web Player” to play converted videos, and by combining it with videos, stream playback can be performed in a browser.
Items that have been combined are referred to as a “Streaming Web Player”.
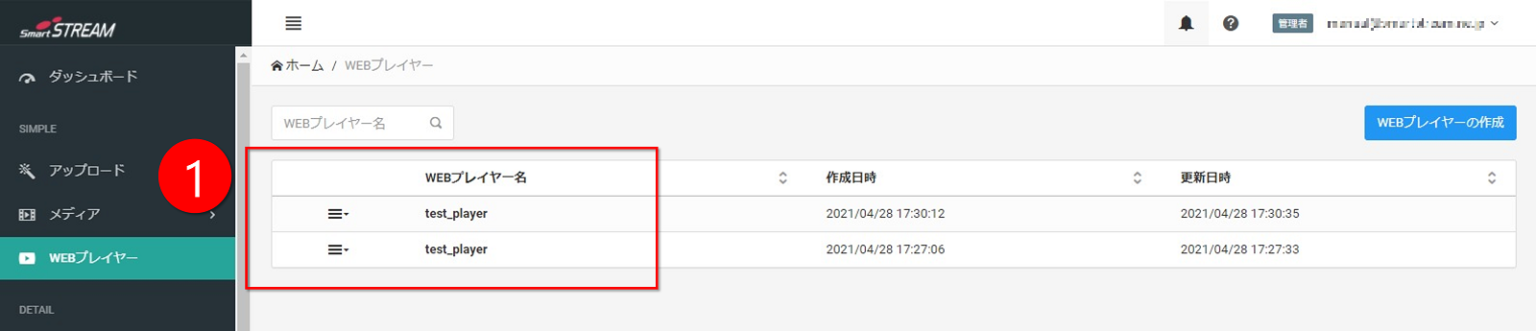
Creating a New Web Player
-

Click Create Web Player in Home > Web Player tab.
-

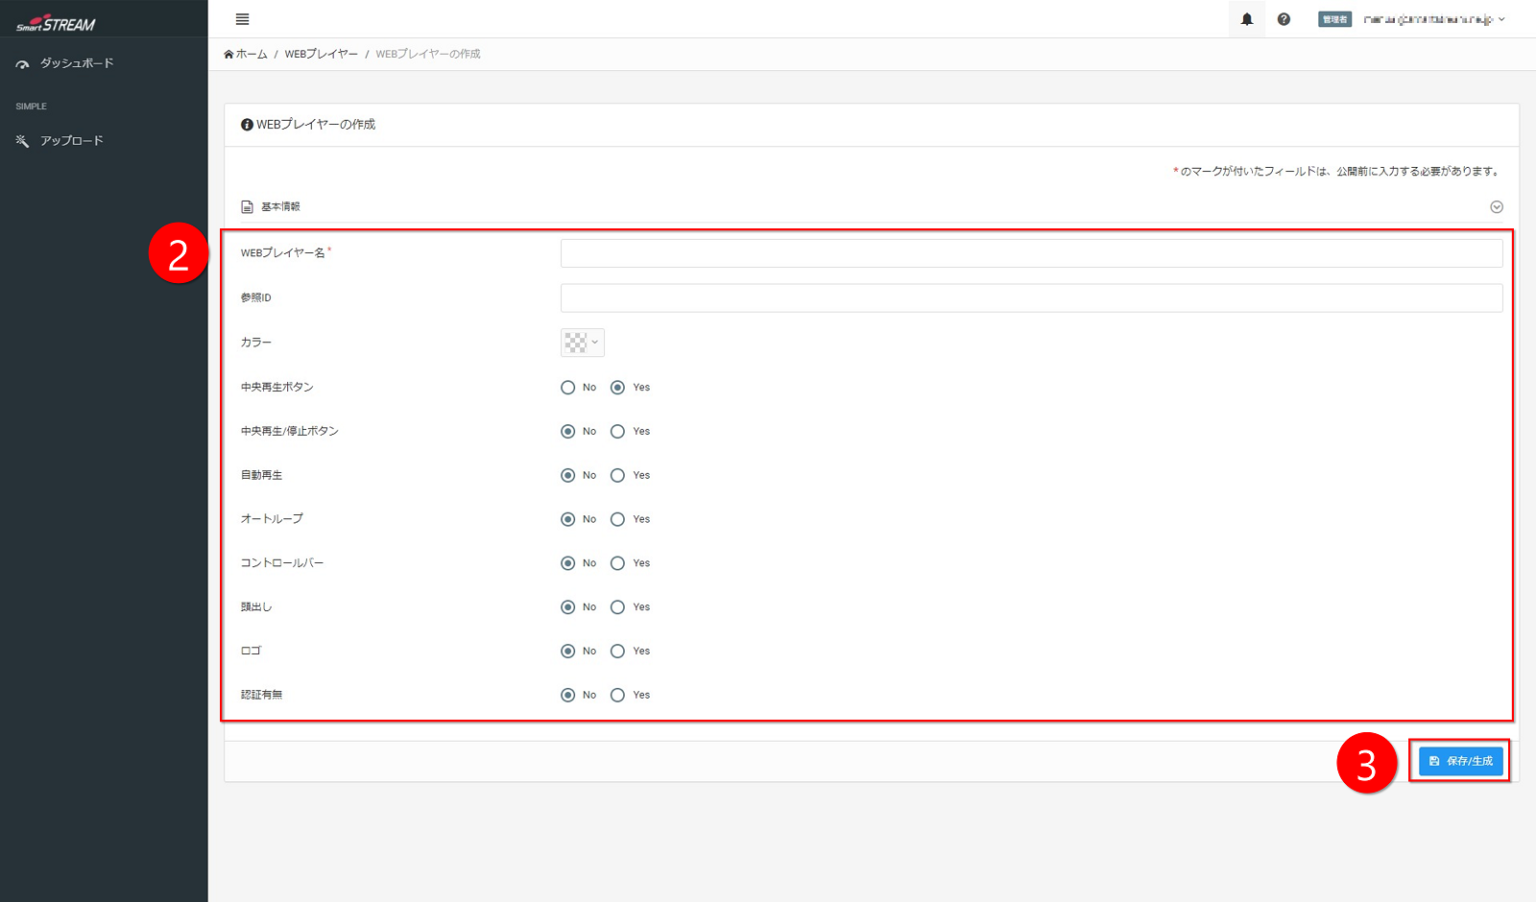
Configure each item.
(Refer to the items below.) -
Click Save / Generate.
Input Items
| Item | Description |
|---|---|
| Web Player Name | Since this will not be made public, please feel free to set a title and description that are easy for administrators to understand. |
| Reference ID | You can set a reference ID for the Web Player. The reference ID is used when operating via API, and it may be left blank. Since it will not be made public, set an ID that is easy for the distributor to understand. |
| Color | You can specify the color of the play button, seek bar, and volume bar. Select from the color bar or directly enter a HEX code. |
| Center Play Button | A play button is displayed in the center of the player before playback starts. In general, set this to Yes. |
| Center Play / Pause Button | During playback, clicking the player itself allows you to toggle between play and pause. In general, set this to Yes. |
| Autoplay | Set this to Yes to automatically start playback after the player is loaded. Depending on the viewer’s browser, playback may not start automatically. |
| Auto Loop | Set this to Yes to automatically loop playback after it finishes. Depending on the viewer’s browser, playback may not start automatically. |
| Control Bar | Specify whether to display the control bar at the bottom of the player (play button, seek bar, volume bar). Unless you want to prevent viewers from performing any operations, generally set this to Yes. Note that if both the control bar and autoplay are set to No, video cannot be played. |
| Seeking | Set this to Yes to allow seeking during live streaming. If set to No, viewers will not be able to rewind during live streaming, and playback will be forced to the live stream. |
| Playback Speed Control | (Can be edited after creating the Web Player) |
| Loop | (Can be edited after creating the Web Player) |
| Logo | Set this to Yes if you want to display a logo (image file, company logo, etc.) in the bottom-right corner of the player. The following will be displayed when the logo is enabled 13-1. Always Display Logo Set this to Yes to always display the logo in the bottom-right corner of the player. 13-2. Logo Image Set the image to be used as the logo. 13-3. Logo Link URL Set a link for the logo. |
| Authentication | Set this to Yes if you want viewers to enter a password before playback. For details, see “Apply Viewing Restrictions (link)”. There are also other ways to restrict who can view content and prevent unauthorized distribution. The following will be displayed when authentication is enabled 14-1.Authentication Password Set the password required for playback. |
Editing an Existing Web Player
-
In the content area of the Home > Web Player tab, click the name of the Web Player you want to edit.
-
Configure each item.
(Refer to the input items below.) -
Click Save / Generate.
Input Items
| Item | Description |
|---|---|
| Web Player Name | Since this will not be made public, please feel free to set a title and description that are easy for administrators to understand. |
| Reference ID | You can set a reference ID for the Web Player. The reference ID is used when operating via API, and it may be left blank. Since it will not be made public, set an ID that is easy for the distributor to understand. |
| Color | You can specify the color of the play button, seek bar, and volume bar. Select from the color bar or directly enter a HEX code. |
| Center Play Button | A play button is displayed in the center of the player before playback starts. In general, set this to Yes. |
| Center Play / Pause Button | During playback, clicking the player itself allows you to toggle between play and pause. In general, set this to Yes. |
| Autoplay | Set this to Yes to automatically start playback after the player is loaded. Depending on the viewer’s browser, playback may not start automatically. |
| Auto Loop | Set this to Yes to automatically loop playback after it finishes. Depending on the viewer’s browser, playback may not start automatically. |
| Control Bar | Specify whether to display the control bar at the bottom of the player (play button, seek bar, volume bar). Unless you want to prevent viewers from performing any operations, generally set this to Yes. Note that if both the control bar and autoplay are set to No, the player cannot be played. |
| Seeking | Set this to Yes to allow seeking during live streaming. If set to No, viewers will not be able to rewind during live streaming, and playback will be forced to the live stream. |
| Playback Speed Control | Set this to Yes to allow changing the playback speed. The following will be displayed when playback speed control is enabled 11-1. Speed Options Enter playback speed options separated by commas. (Example: 0.5, 1.0, 1.5) |
| Loop | Set this to Yes if you want to display the loop button after playback finishes. |
| Logo | Set this to Yes if you want to display a logo (image file, company logo, etc.) in the bottom-right corner of the player. The following will be displayed when the logo is enabled 13-1. Always Display Logo Set this to Yes to always display the logo in the bottom-right corner of the player. 13-2. Logo Image Set the image to be used as the logo. 13-3. Logo Link URL Set a link for the logo. |
| Authentication | Set this to Yes if you want viewers to enter a password before playback. There are also other ways to restrict who can view content and prevent unauthorized distribution. For details, see "Apply Viewing Restrictions (link)". The following will be displayed when authentication is enabled 14-1. Authentication Password Set the password required for playback. |