SmartSTREAM Startup Guide
Return to the User Support Site TopLive Streaming Video
Using live streaming allows viewers to watch video in real time.
Here, we explain the steps from preparing a live stream, uploading video, and stopping the stream after distribution.
Prior registration is required to use this feature.
Create a Profile
Create a profile for live streaming via Home > Profile > Create Profile.
Configure video quality and format settings when converting common video files (.mp4, .mov) into file formats suitable for streaming.
A profile is a collection of initial settings such as video resolution and format, and must be created separately for live streaming and on-demand streaming. Here, we explain the procedure for creating a profile for live streaming.
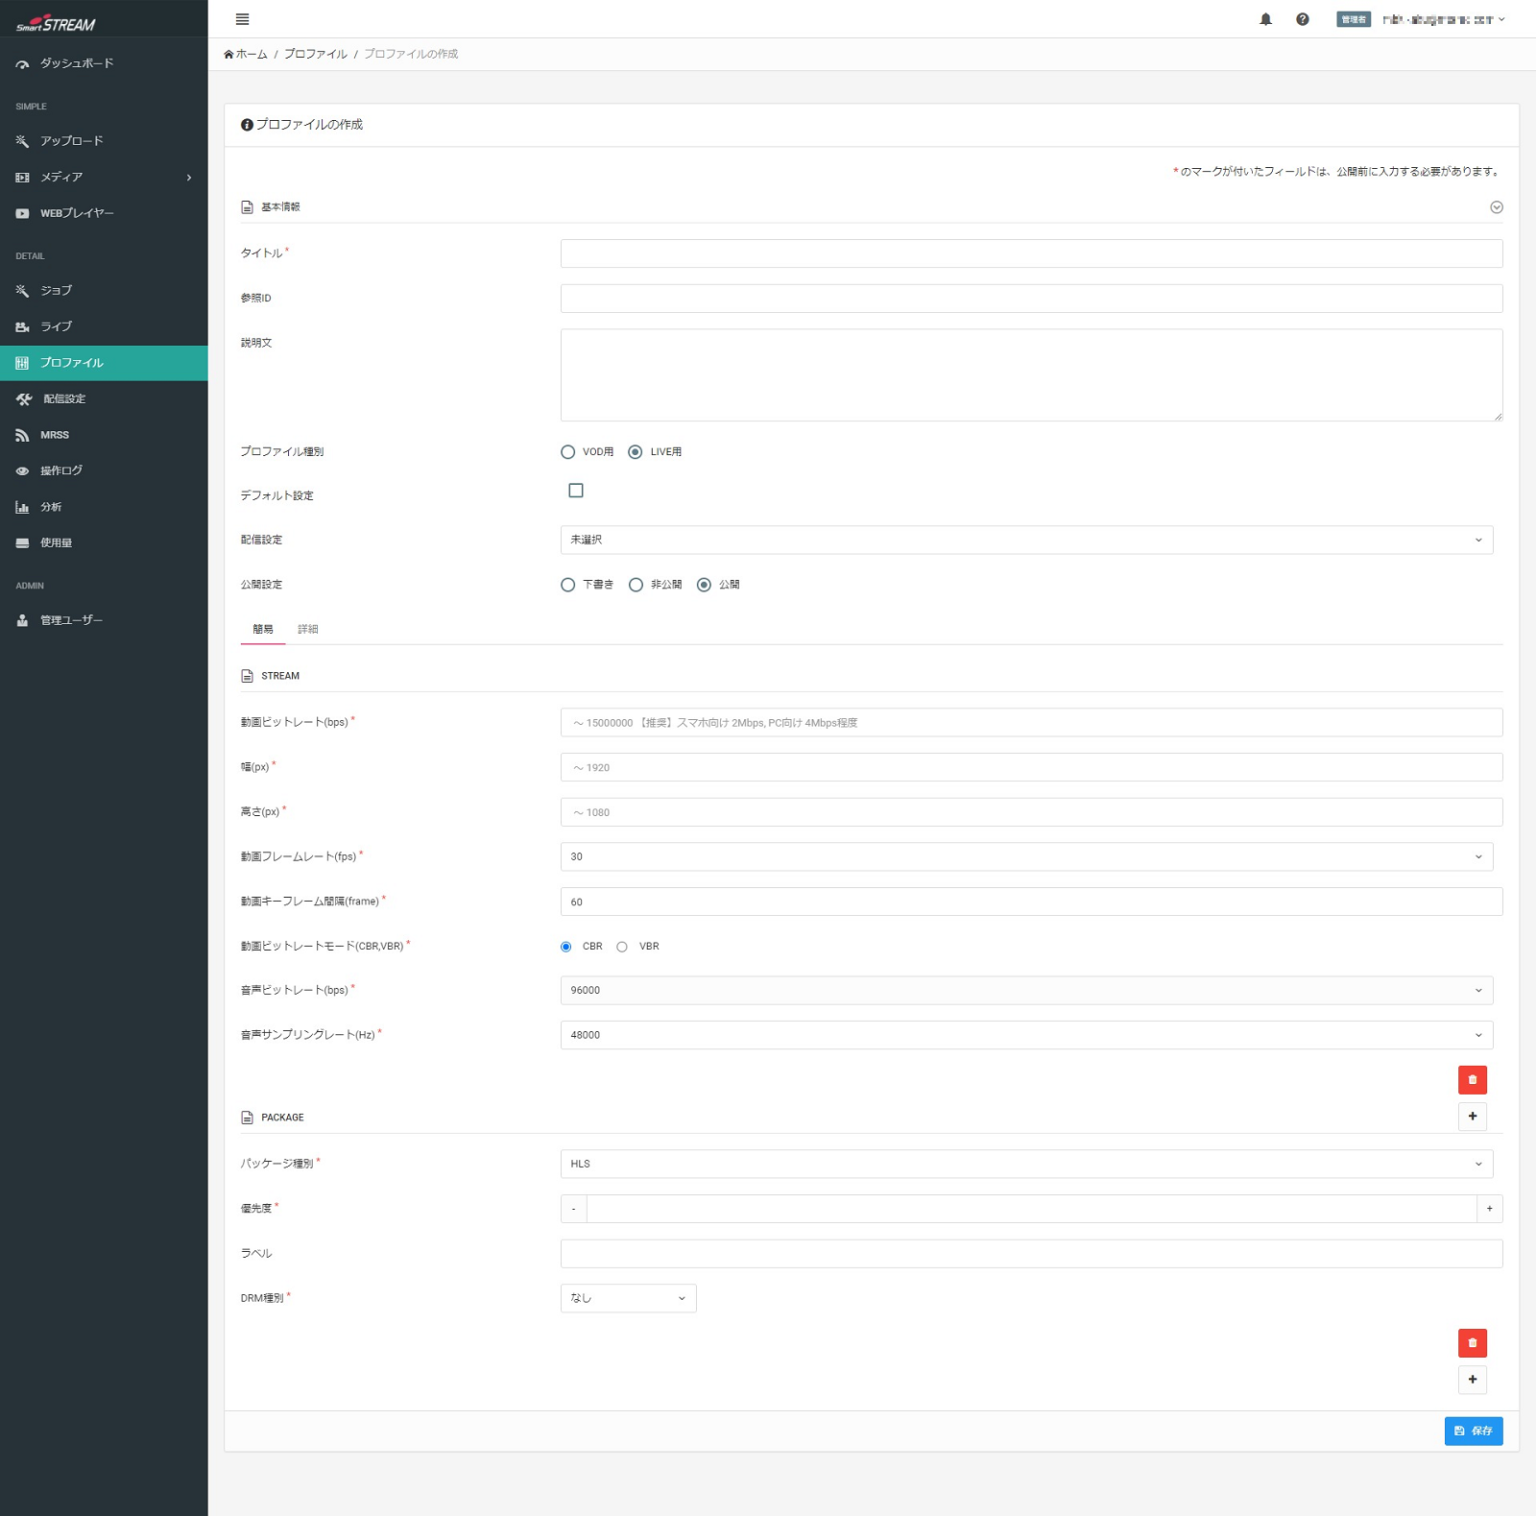
Profile Item Descriptions and Input Examples
| Item | Description | Recommended Default Settings |
|---|---|---|
| Title / Description | Since this will not be made public, please feel free to set a title and description that are easy for administrators to understand. | Optional |
| Profile Type | Select “For VOD” for on-demand streaming, or “For LIVE” for live streaming. | |
| Default Setting | Check this if it is a frequently used profile. | Blank |
| Streaming Settings | Select this if you want to use streaming settings configured in the “Apply Viewing Restrictions” section. | |
| Publication Setting | You can choose Draft, Private, or Public for the profile settings. | Public |
| Video Bitrate (bps) | Specify the video quality. The unit is bps. Higher values allow for higher-quality video, but if the viewer’s network connection is slow—such as on a mobile network—smooth playback may not be possible. | For smartphones (mobile networks): 1000000–2000000 For PCs (fixed-line networks): 2000000~4000000 |
| Width (px) | Specify the width of the streamed video in pixels. | Low quality: Width 640 Height 380 High quality: Width 1280 Height 720 |
| Height (px) | Specify the height of the streamed video in pixels. | |
| Video Frame Rate (fps) | Specify the frame rate of the streamed video in fps. The higher this value, the smoother the video appears but the file size increases. | 30 |
| Video Keyframe Interval (frames) | Specify the interval between frames. Higher values result in faster scene changes, but increase file size. | 30 |
| Video Bitrate Mode | CBR: Constant bitrate. Communication is performed at a fixed bitrate at all times. VBR: Variable bitrate. The bitrate is not fixed and adjusts as needed according to the video content. |
VBR |
| Audio Bitrate (bps) | Specify the audio bitrate. | 96000 |
| Audio Sampling Rate (Hz) | Specify the audio sampling rate. The sampling rate is the number of samples per second. Higher values improve audio quality but increase file size. | 48000 |
| Package Type | Select the video format used during streaming from HLS or MPEG-DASH. | HLS |
| Priority | You can specify the order in which packages are processed using an integer. Leave this blank if you are not setting multiple packages. | Blank |
| Label | You can assign labels to package settings for management purposes. | Blank |
| DRM Type | You can select the type of DRM encryption. The available DRM types vary depending on the selected package type. |
None |
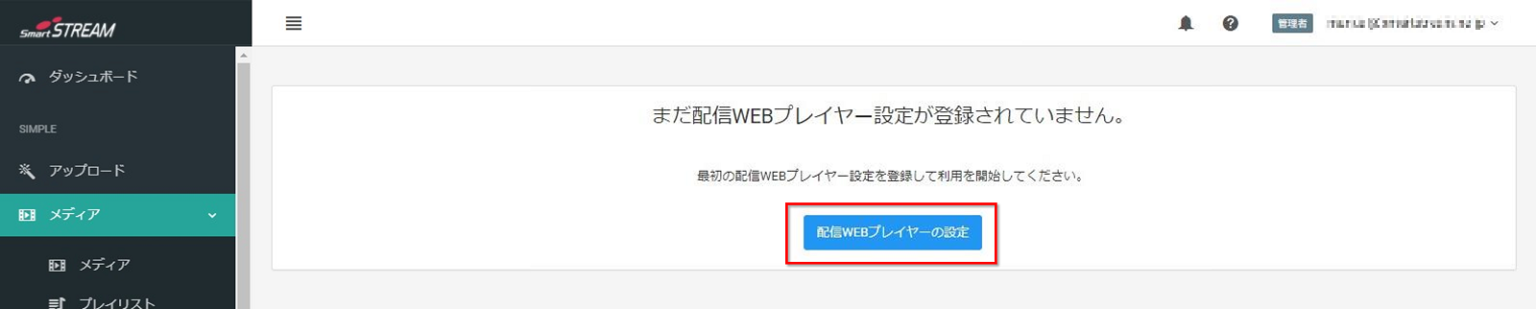
Create a Web Player
If you use an already created Web Player, skip this section and proceed to "Create a Profile".
If you do not have a Web Player, create one as described below, then proceed to "Create a Profile".
-

Click "Create Web Player" under Home > Web Player tab.
-

Set a Web Player name.
-
Configure colors, controls, and other settings according to your preferences.
-
Click Save / Generate.
- Even if "Autoplay" is set to Yes, it may not function correctly depending on browser specifications.
In that case, please press the play button to start playback manually. - It is recommended to set both "Center Play Button" and "Center Play / Pause Button" to Yes.
Recommended LIVE Player Settings
| Item | Recommended Basic Settings (Live) |
|---|---|
| Web Player Name | Since this will not be made public, please feel free to set a title and description that are easy for administrators to understand. |
| Reference ID | Blank |
| Color | User-defined |
| Center Play Button | Yes |
| Center Play / Pause Button | Yes |
| Autoplay | Yes |
| Auto Loop | No |
| Control Bar | Yes |
| Seek | No |
| Playback Speed Change | No |
| Loop | No |
| Logo | No (Yes if a logo is configured) |
| Authentication | No (Yes if password authentication is configured) |
*If customization is applied, proceed to Customize Player
Create a Live Event
-
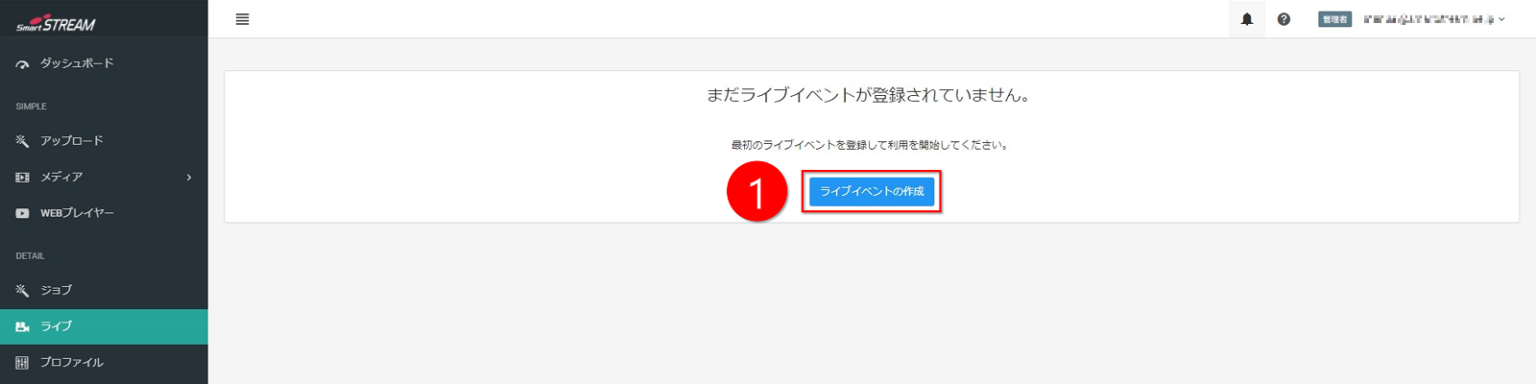
Click Create Live Event under Home > Live tab.
-
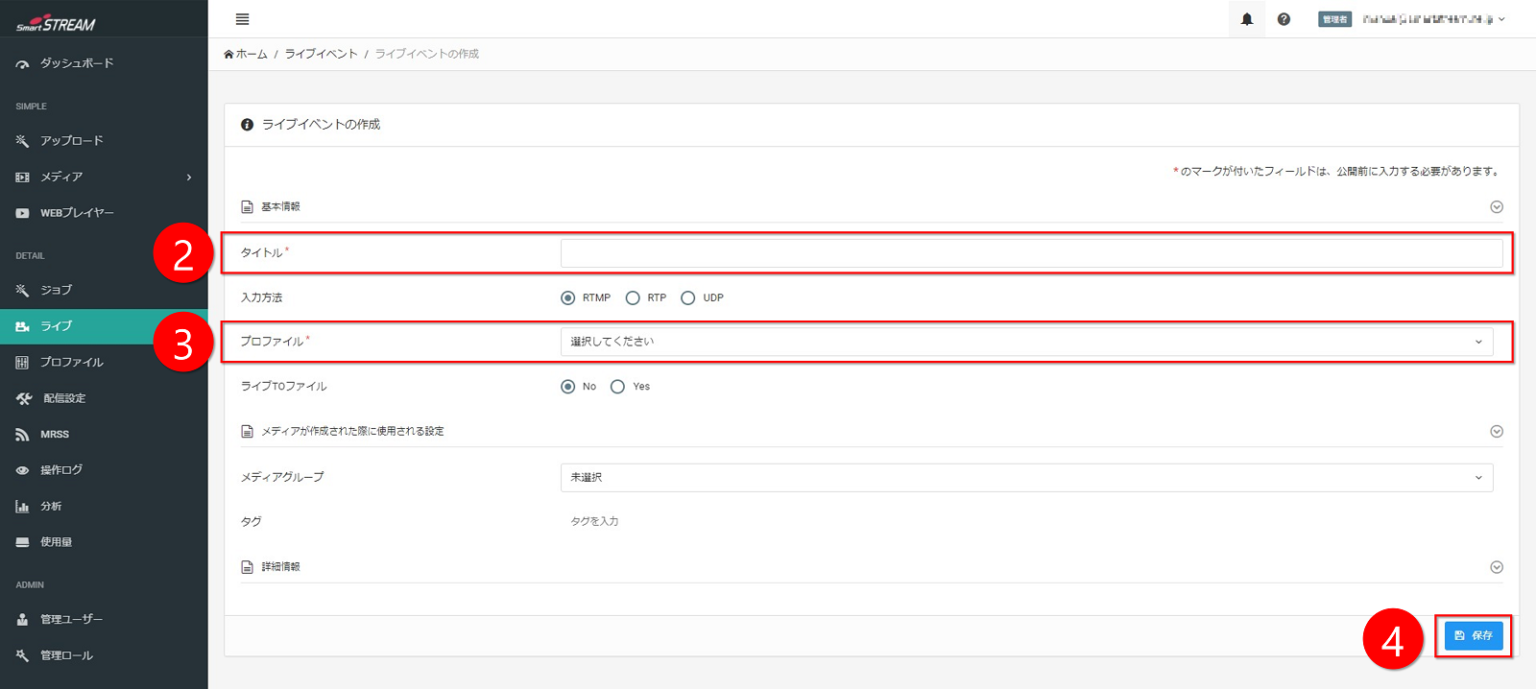
Set a title.
-
Select a profile. (Only LIVE profiles are displayed.)
-
Click Save. (The Start Live button will be displayed.)
-

Click Start Live.

Even if you click Start Live, the live video will not be streamed. Next, upload a video. Streaming will begin once the video is uploaded.
Recommended Live Event Settings
| Item | Description | Recommended Basic Settings (Live) |
|---|---|---|
| Title | Since this will not be made public, please feel free to set a title and description that are easy for administrators to understand. | Optional |
| Input Method | Select the method for transmitting video to the server from RTMP, RTP, or UDP. | RTMP |
| Profile | Select the profile configured in “1. Create a Profile”. | |
| Live to File | Set this to Yes if you want to record the entire live stream and make it available later as on-demand content. If you want to record only part of the live stream and distribute it on demand, set “Scheduled Video Clips” after creating and saving the live event. For details, see the “Record Live Streams” section. | Yes if recording is required |
| Media Group | You can specify which media group (= folder) this video belongs to. | Not selected |
| Tags | You can specify tags. Tags can be used for searching. | Blank |
| Reference ID | You can specify a reference ID for the live stream. The reference ID is used for live searches. | Blank |
| Description | Description of the live stream. | Blank |
*If you upload video using the “Rental Live Encoder,” proceed to “How to Use the Rental Live Encoder”.
Management Screen After Starting Live Streaming
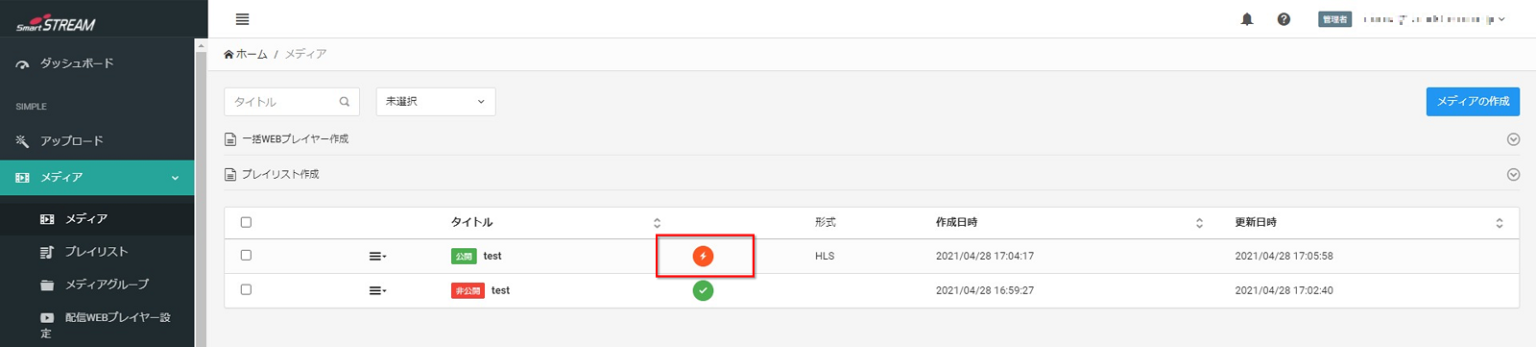
Live Event List
Home > Live
- After some time has passed since starting the live stream, the encoding icon will change.
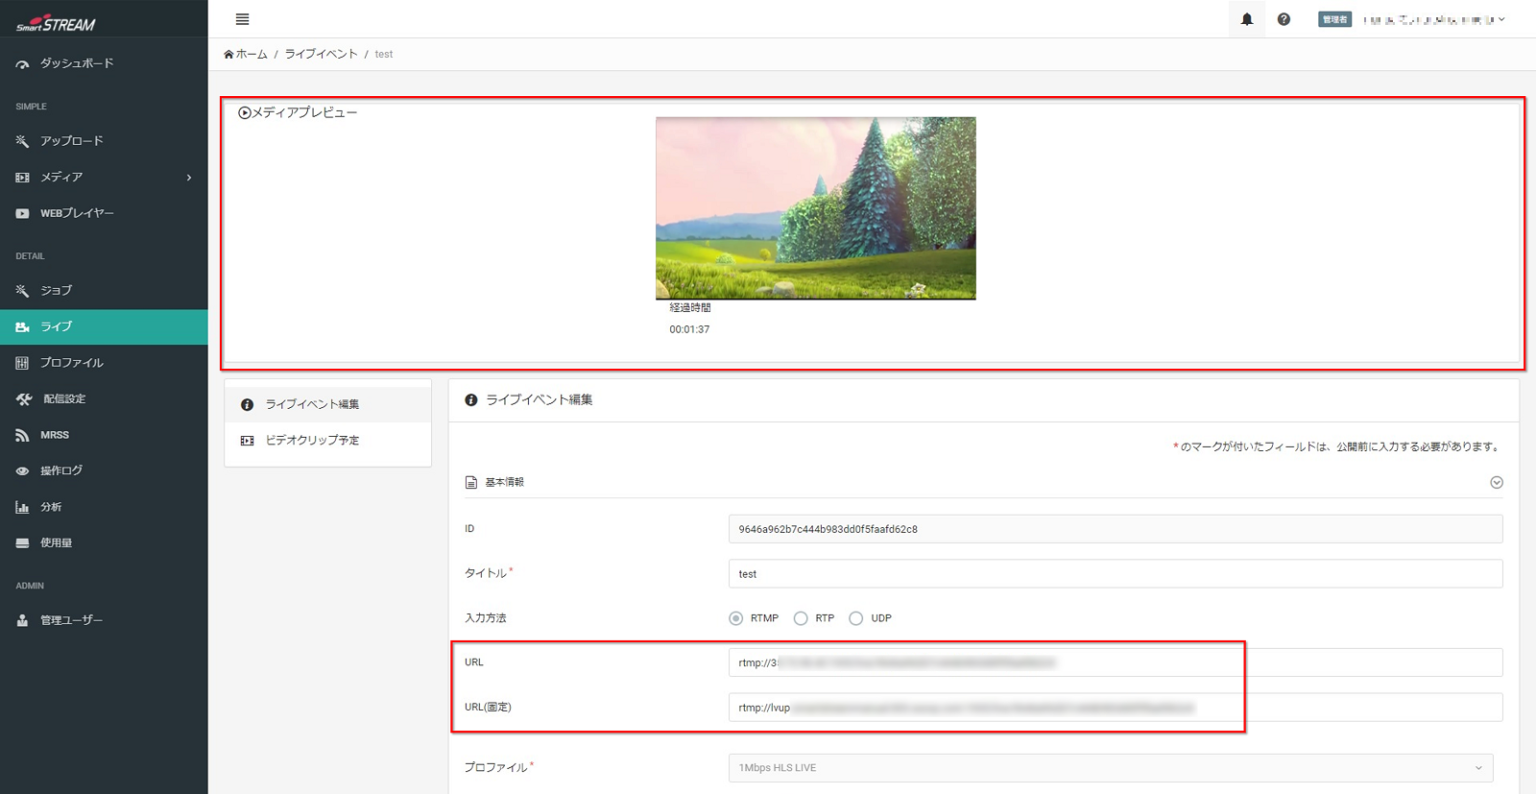
Live Event Details
Home > Live > Applicable Live Event
- When the live stream starts, the live event changes as shown below, and the upload URL for the live video is displayed.
Upload and Encode Video
After the live stream starts, upload the live video to the upload URL displayed in the live event using a live encoder prepared by the customer.
*For our rental encoder LiveShell, proceed to “How to Use the Rental Live Encoder”.
![]() Example Live Upload Methods
Example Live Upload Methods
Below are examples of upload methods by INPUT protocol using FFMPEG, which have been verified by our company.
-
RTMP
ffmpeg -stream_loop -1 -re -i <video file> -vcodec copy -acodec copy -f flv -
UDP
ffmpeg -stream_loop -1 -re -i <video file> -codec copy -f mpegts ?pkt_size=1316 -
RTP
ffmpeg -stream_loop -1 -re -i <video file> -codec copy -f rtp_mpegts -fec prompeg=l=8:d=4 ?pkt_size=1316
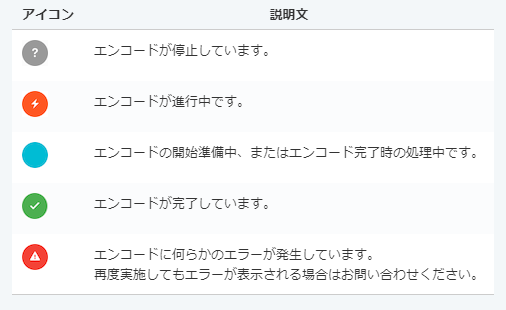
![]() Explanation of Encoding Status Icons
Explanation of Encoding Status Icons
Management Screen After Live Upload Starts
Live Event List
Home > Live > Applicable Live Event
- When the upload starts, it is displayed as shown below.

- Displays LIVE media (output video). This shows how it will appear when actually viewed in the player.
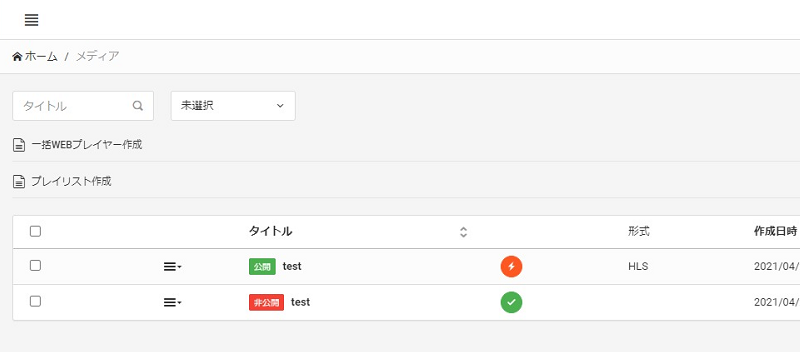
Management Screen After Live Upload Starts
Media List
Home > Media
- Media with the same name as the live event is automatically generated in the media list.
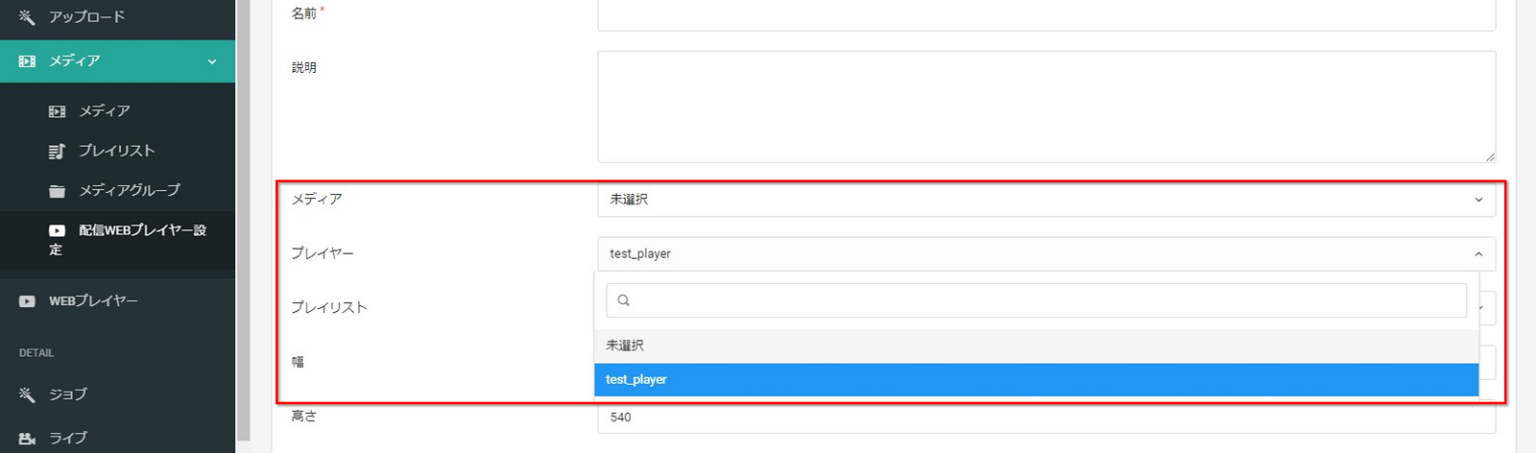
Streaming Web Player Settings
Home > Media > Streaming Web Player Settings
- Configure the live media and Web Player. Set the required information and select the live media from the pull-down menu.
▼
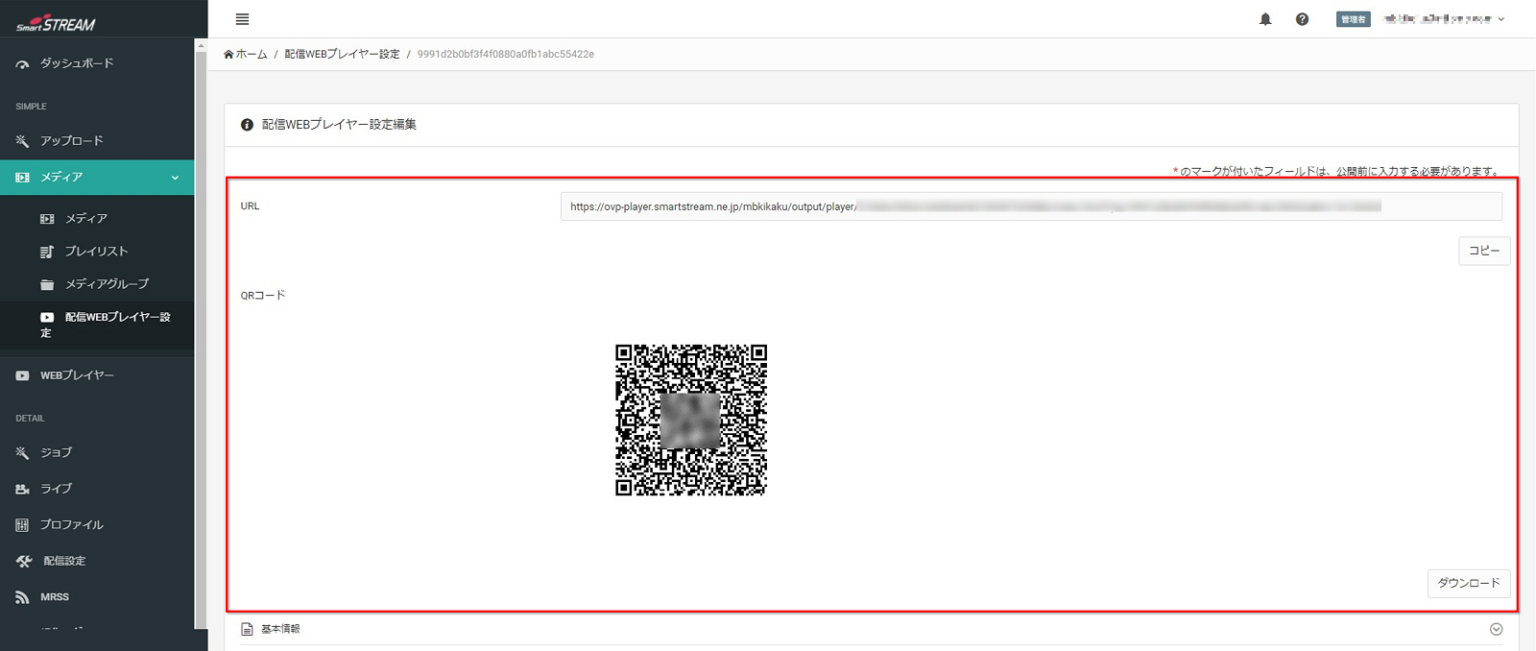
- When the streaming Web Player settings are saved, a viewing URL and HTML tags (iframe/Video tag) are automatically generated. Use either HTML tag when embedding the player into a web page.

Stop the Live Stream

When the live stream ends, click Stop Live for the applicable live event via Home > Live > Applicable Live Event.
At the same time, please also stop uploading the live video from the encoder.
Please be careful not to forget to stop the live stream.
[Reference] Management Screen After Stopping the Live Stream
Home > Live > Applicable Live Event
- The preview at the top of the live event disappears.

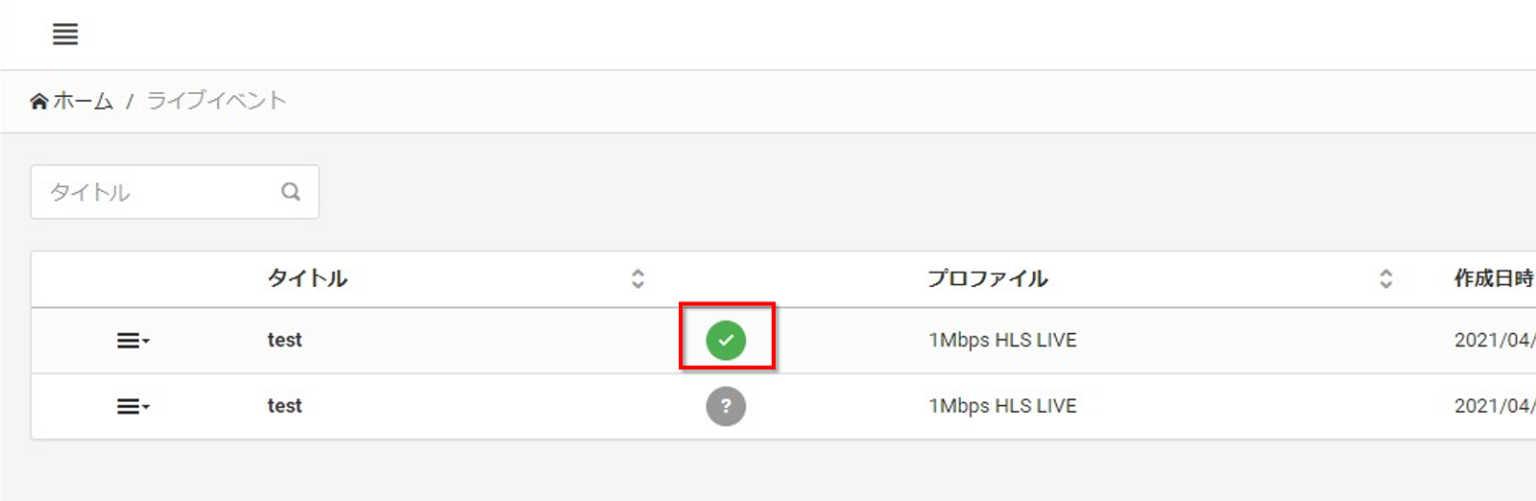
Home > Live Event List
- The status icon changes to a
 mark.
mark.
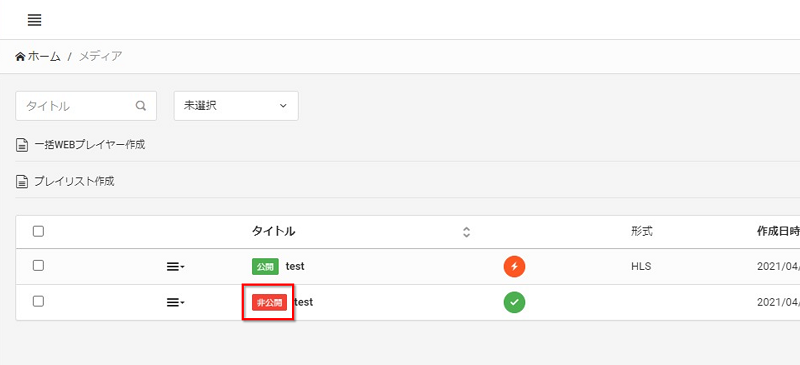
Home > Media List
- The publication rule changes toPrivate.